What is the printing sequence for such a glass cover with icons?

Step 1 is to carve out the icons and numbers
Step 2 is to print two layers of black
Step 3 is to print the white icons or numbers.
This type of glass cover with LCD digital display is printed like this.
But what about the white version?

Is it possible to print in the same sequence as the black version above? That is, there is a “halo” around the icon.
The reason for this kind of “halo” phenomenon is: the white models usually has 3 layers of white paints + 1 layer of gray paint,of which 3 layers of white paints are in the place of the icons or numbers, each layer needs to be extended,and there will be a small step between each layer.White ink itself belongs to the transparent series ink, so when the LED lights passes through,this kind of “halo” will appear around the light-emitting area, which will cause a fuzzy and dizzy vision.

👉 There was a circle of “halo” around, and looked blurred and dizzy.
Although most customers can accept it, how can we do better, and how can we avoid this kind of “halo” without changing the customer’s design?
With the experience of the radium carving case (here is a link to how to print a pattern with only 0.15mm line width? ), let’s change the traditional printing sequence:
Step 1: Print 3 layers of white on the whole surface (don’t hollow out)
Step 2: Print 1 layer of gray
Step 3: Laser engraves icons or numbers
Step 4: Print semi-transparent ink on the back

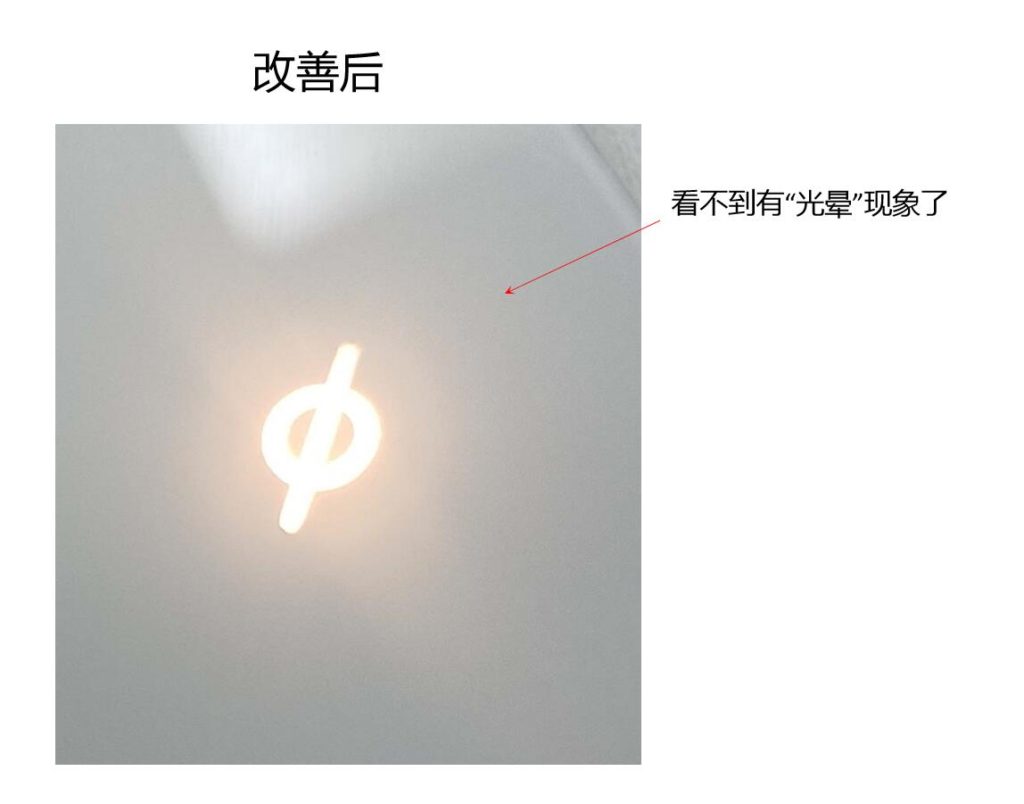
👉 No “halo” anymore
In this way, the “halo” phenomenon can be completely resolved, and the vision is more comfortable. It should be noted that the thickness of the ink printed on the entire surface needs to be controlled by the thickness that the laser can penetrate.
Keep improving is our core value, to improve customers’ satisfaction and help customers sell products better, we have been working hard all the time!
